
Wicked Design Support Page
Mail Client Manual Settings
Secure SSL/TLS Settings (Recommended)
Username: youremail@yourdomain.com (full email address, replace with yours)
Password: Use the email account’s password.
- Incoming Server: server.loudoundesign.com
* IMAP Port: 993
* POP3 Port: 995
- Outgoing Server: server.loudoundesign.com
* SMTP Port: 465
IMAP, POP3, and SMTP require authentication.
Non-SSL Settings (NOT Recommended)
Username: youremail@yourdomain.com (full email address, replace with yours)
Password: Use the email account’s password.
- Incoming Server: mail.yourdomain.com
* IMAP Port: 143
* POP3 Port: 110
- Outgoing Server: mail.yourdomain.com
* SMTP Port: 587
IMAP, POP3, and SMTP require authentication.
WordPress and Avada Theme Support
WordPress Support: https://wordpress.org/support
WordPress Plugins: https://wordpress.org/plugins
Avada Theme Documentation: https://theme-fusion.com/support
Website Editing Training
This guide provides a practical introduction to updating a WordPress website built with Avada. Before making changes, review the page structure and preview your work when possible. Keep edits focused, use clear page titles and headings, and confirm that the site still looks correct on both desktop and mobile views.
Pages, Posts, and Media
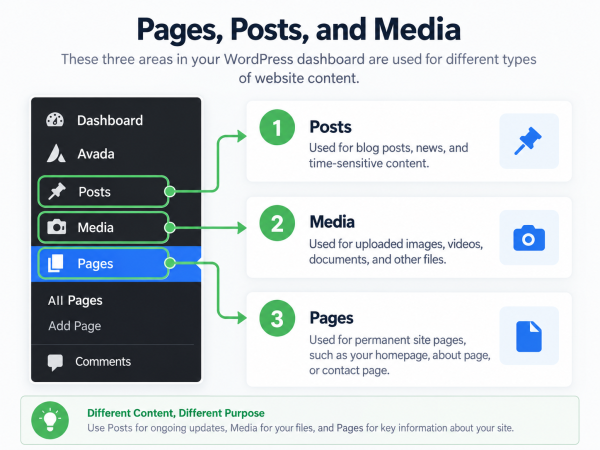
Pages are used for permanent website content, such as the Home, About, Services, and Contact pages. Posts are typically used for time-sensitive content such as news updates, announcements, or blog articles. When adding images, documents, or other visual assets, use the Media Library. Give uploaded files meaningful names and use appropriately sized, optimized images to help pages load efficiently.
Editing with Avada
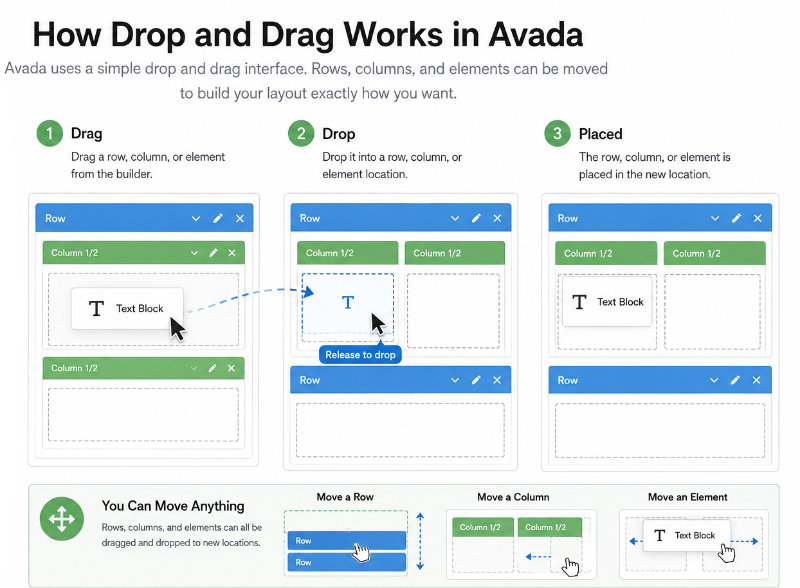
Most page layout changes are made in Avada Training using rows, columns, and content elements. Each row is identified by a blue border when selected. Rows, columns, and elements can be repositioned with drag-and-drop controls, allowing you to reorganize content without rebuilding the page.
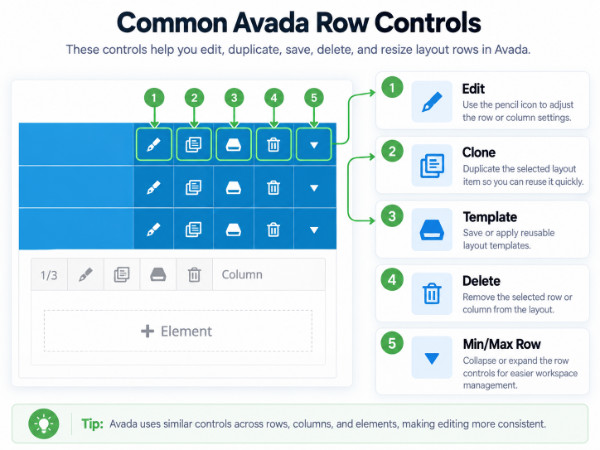
The editing controls are generally consistent throughout Avada. Use the column-width option to adjust how much horizontal space a column occupies. Select the pencil icon to edit a row, column, or individual element. Use clone to duplicate an item, template to save or apply reusable layouts, and delete to remove content that is no longer needed. Make only intentional deletions, as removing a layout element can also remove its content.
Updating Text and Images
To update text or photos, select the pencil icon for the relevant content element. Replace text carefully while preserving headings, links, and formatting where appropriate. When changing an image, choose or upload the replacement through the Media Library, then check that the image is cropped, aligned, and sized correctly. Always review the page after saving to confirm that text wraps properly and images display as expected.
Forms
Website forms are managed through Avada → Forms. Open the relevant form to edit existing fields or add new ones. Common fields include name, email address, phone number, and message. Form display options and email settings are located beneath the list of fields; verify both areas whenever a form is changed so that submissions continue to appear correctly and are sent to the right recipient.
Footer
Footer content is updated by editing Footer 1 through Footer 4. These areas control the information displayed across the bottom of the website, such as contact details, navigation links, and copyright text. Because the footer often appears throughout the site, review several pages after making a change.
User Login Accounts and Roles
User access is controlled through WordPress roles. Assign roles thoughtfully and give each person only the access they need. Administrators have broad site control, while other roles may have more limited abilities to create, edit, publish, or manage content. Review user access periodically, especially when responsibilities change.
Avada Slider
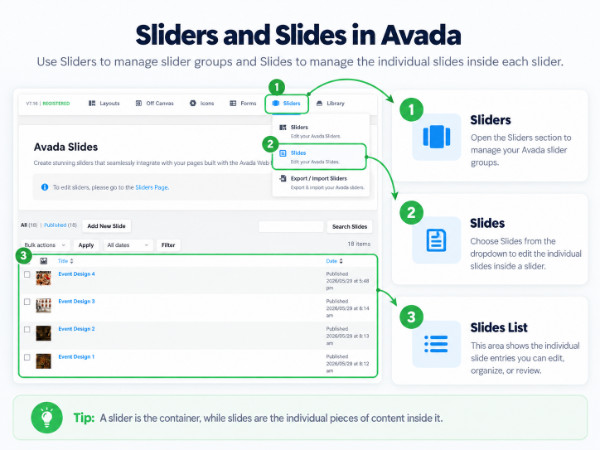
Visit Avada -> Slider to visit the slider area. Sliders are the containers in which the Slide go. To visit just the individual Slides when viewing the Slider page, hover over Sliders at the top, then click on the Slides drop-down. You will then see a list of slides, and which Slider they are assigned to. Slides can be copied to create new ones.
Final Check
Before finishing any update, save your changes, preview the affected page, and test links, images, and forms. Check the page on mobile as well as desktop, and correct any spacing, formatting, or display issues before publishing changes for visitors.